Getting Started With NGINX

Learning Nginx - Sophia Zhang
I still remember how confused I was when I needed to add some redirection in NGINX config file. At that time I thought NGINX was only used for matching URIs and doing redirects. Later, I’ve heard bits and pieces about Load balancing, Reverse proxy, Authentication … ![]() Then, I have decided - its time to learn what NGINX is.
Then, I have decided - its time to learn what NGINX is.
This blog post covers the following content:
1. Installation
Assuming you are using Ubuntu system, then the command for install nginx would be
	sudo apt update
	sudo apt install nginx
After successful installation, you should be able to validate the installation result by enter
nginx -v
and see the installed nginx version. You can also check the nginx status by running
systemctl status nginx
by default, you should be able to see
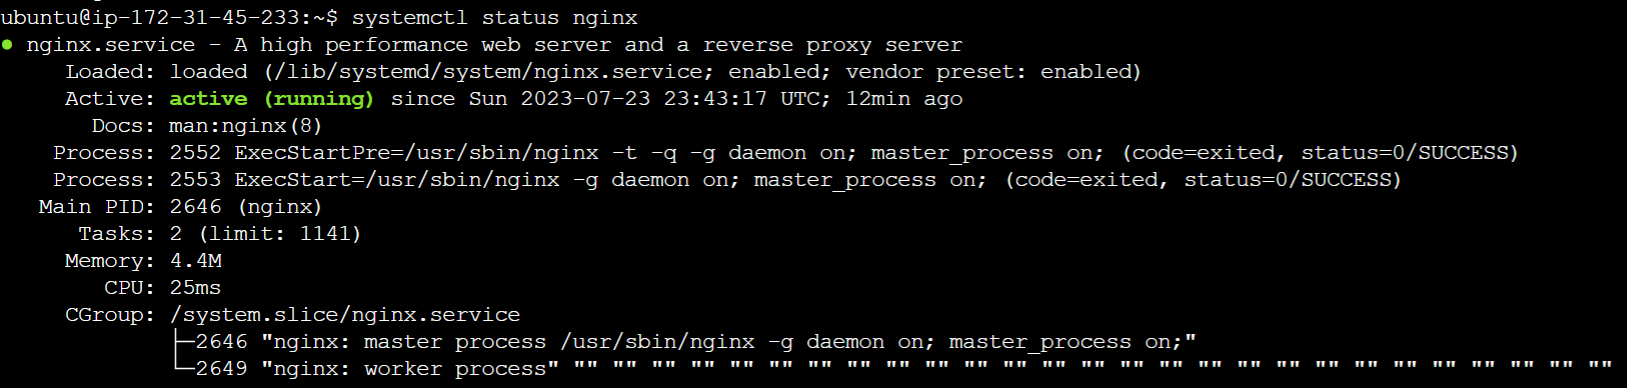
which indicates that nginx is running.
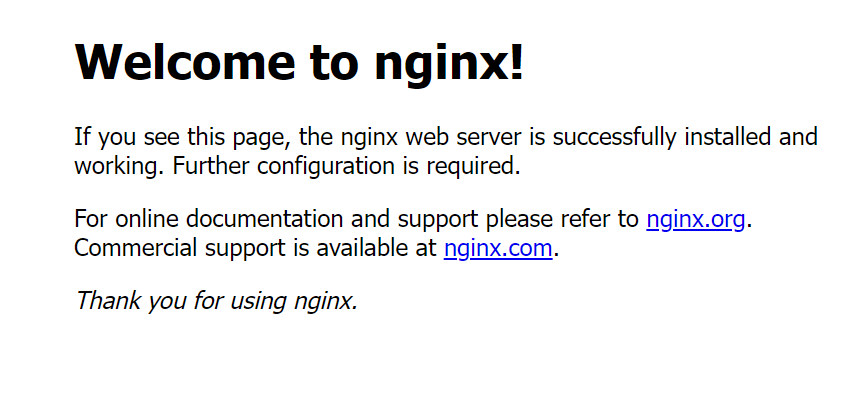
And you should be able to see the following content in / of the instance you used for this nginx exercise (given that when the virtual machine is set up, the port 80 is open).
2. Nginx folder stucture
By default, Nginx creates its configuration folders in the following locations.
Configuration Files:
The main Nginx configuration file is located at: /etc/nginx/nginx.conf.
Additional configuration files can be found in the /etc/nginx/conf.d/ directory and /etc/nginx/sites-available, /etc/nginx/sites-enabled, as specified in nginx.conf file:
# nginx.conf

http {
	...
	##
	# Virtual Host Configs
	##
	include /etc/nginx/conf.d/*.conf;
	include /etc/nginx/sites-enabled/*;
}
While both /etc/nginx/conf.d/ and /etc/nginx/sites-enabled are used to manage custom configurations, their purposes are different:
-
The configration files for all websites (including non-active ones) are usually stored in
sites-availabledirectory. By adding or removing the symbolic links to the files insites-availableintosites-enabledallows effectively enabling or disabling a website.e.g.:
cd /etc/nginx/ sudo ln -s sites-available/example.conf sites-enabled/ # creating a symbolic link enables example website sudo unlink sites-enabled/example.conf # removing a symbolic link disables example website -
The
conf.ddirectory is typically used for global configurations, server blocks that apply to all virtual hosts.
Web Server Root Directory:
The default web server root directory (where the website files are served from) is: /var/www/html/, and the Nginx welcome page is usually stored here. Often, the custom websites’ pages are stored in separate subfolders under /var/www.
Log Files:
The default locations for log files are defined in nginx.conf.
# nginx.conf

http {
	##
	# Logging Settings
	##

	access_log /var/log/nginx/access.log;
	error_log /var/log/nginx/error.log;
}
So, you would be able to find the records for every HTTP request Nginx receives (all incoming requests, including successful and unsuccessful ones) in /var/log/nginx/access.log. The error messages and issues that occur during the operation of the Nginx server are logged in /var/log/nginx/error.log.
The access_log and error_log directive can also be used inside location and server blocks. This is recommended for more detailed monitoring and analysis.
3. Getting started to build a custom nginx config for your website 
As discussed before, a custom config file can be put in /etc/nginx/conf.d/ or /etc/nginx/sites-available directory. For simplicity of development, we will just create a new config file under /etc/nginx/conf.d/ folder.
Note: There is a default file under
/etc/nginx/sites-enabled. To make sure the test is using our configuration, we need to unlink it beforehand.
sudo unlink sites-available/default
Firstly, let’s define the server directive:
# [YOUR_CUSTOM_SITE].conf

	server {
		listen 80;
		server_name  example.com www.example.com;
		root /var/www/[YOUR_CUSTOM_SITE_FOLDER];
		index index.html index.php;

		access_log /var/log/nginx/[YOUR_CUSTOM_SITE].access.log;
		error_log /var/log/nginx/[YOUR_CUSTOM_SITE].error.log;
	}
In the above block of code, listen directive means that nginx will listen on port 80 for HTTP connections.
The server_name directive tells nginx to respond to the indicated web hosts’ requests (the server’s domain names or IP addresses). It is used to match the incoming HTTP request’s “Host” header and to determine which website’s configuration to use. If the requested host does not match any of the server_name blocks, nginx will use the default server block which contains listen 80 default_server;.
The root directive defines the location of the websites’ files. The index directive controls which file should be served as default when a client requests the root URL or a directory URL of your website. In this case: index index.html index.php;, nginx will try to serve index.html if it exists otherwise serve index.php. If neither file exists in the root directory, nginx will return the HTTP error 404 Not Found. If you want to return a directory listing to the client you can enable that by using autoindex on directive inside the server block.
# [YOUR_CUSTOM_SITE].conf

	server {
		listen 80 default_server;
		...
		index index.html index.php;
		autoindex on;
	}
nginx -t
nginx will detect if there are any issues in the config file we have added.
If everything is fine, we can run the following command to let nginx to load the new config:
systemctl reload nginx
Another command would also be helpful for checking nginx running status
systemctl status nginx
With the above config running in the virtual machine, let’s test the configuration by visiting the root of the virtual machine’s domain in the browser. The result of the / request is:
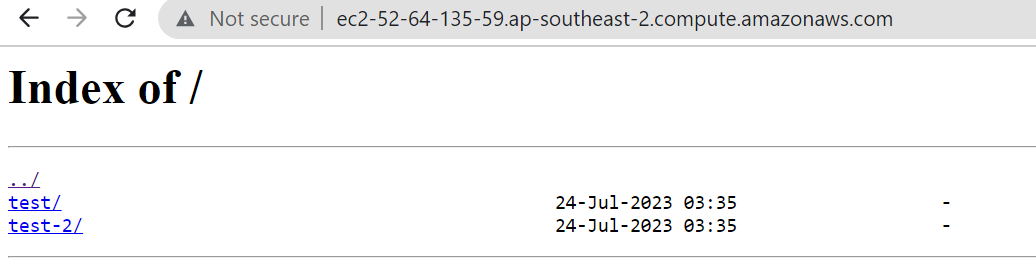
Note that my /var/www/example only contains two directories, test and test2, so, the result is as expected.
To add more control over handling different URI paths, location directives are used to nginx’s behaviour when requests match the specific URI patterns.
# [YOUR_CUSTOM_SITE].conf

server {
		location /test {
			autoindex on; #Allow the contents of the /test folder to be listed
			access_log /var/log/nginx/[YOUR_CUSTOM_SITE].test.access.log; # custom access log for the location
			error_log /var/log/nginx/[YOUR_CUSTOM_SITE].test.error.log; # custom error log for the location
		}
}
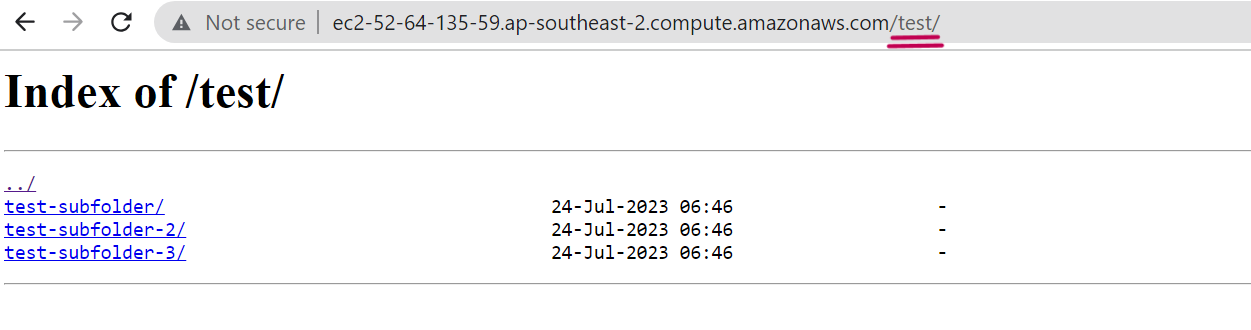
Note that in location directive, autoindex, access_log and error_log can also be used. When I make a request to /test, the following page is returned:
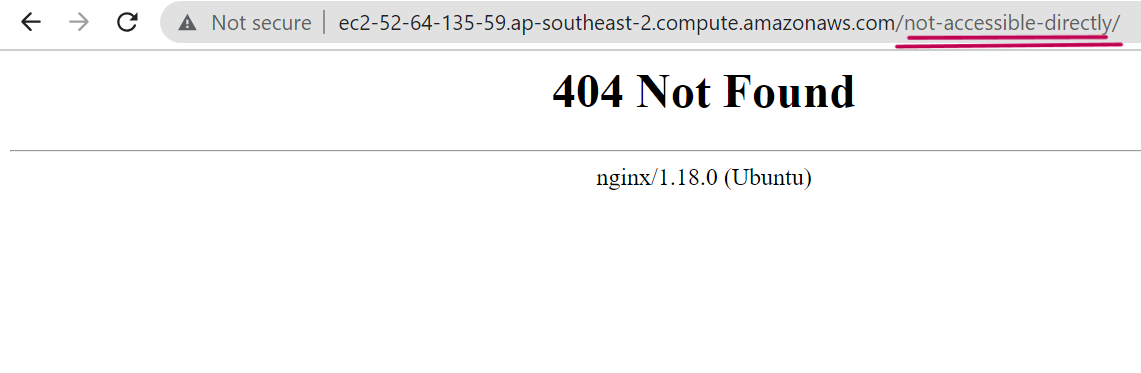
To make a URL not accessible directly, we can use the internal directive:
# [YOUR_CUSTOM_SITE].conf
server {
	...

		location /test {
			autoindex on; #Allow the contents of the /test folder to be listed
			access_log /var/log/nginx/[YOUR_CUSTOM_SITE].test.access.log;  # custom access log for the location
			error_log /var/log/nginx/[YOUR_CUSTOM_SITE].test.error.log; # custom error log for the location

		location /not-accessible-directly {
			internal;
		}
}
Trying to access /not-accessible-directly directly in the browser returns 404 Not Found.
To limit acces to some locations to certain IP addresses, allow and deny directive are used. One thing worth noting is the sequence of allow and deny directives matters. The deny directive should always be put after allow directives. This way, only the IP addresses specified in the allow directives get access to the asset, and all other IP addresses are denied from accessing the location.
# [YOUR_CUSTOM_SITE].conf
	server {
		location /restricted {
			allow 127.0.0.1;
			deny all;
		}
	}
After reloading the configuration above, a request from my laptop gets 403 Forbidden returned.
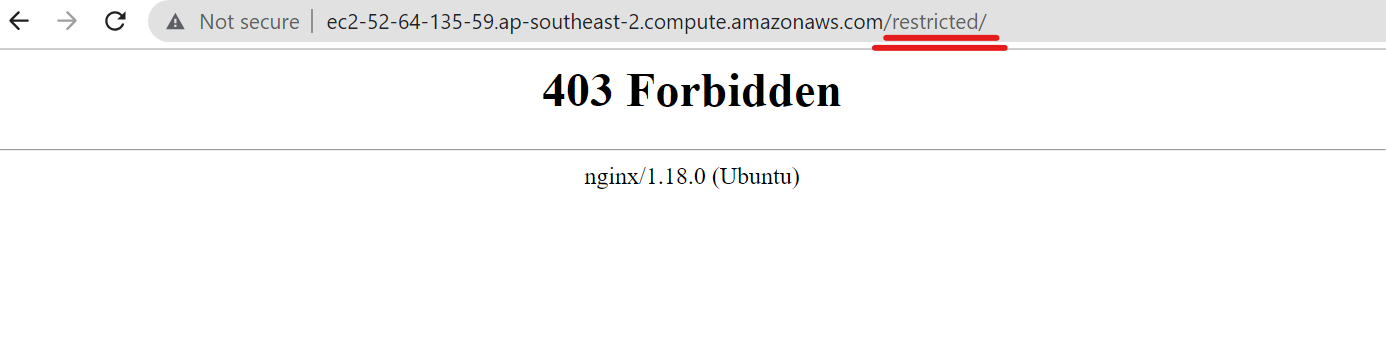
At the same time, accessing the same URL from the inside of my virtual machine through curl command returns the correct content as expected.

You can also protect directories by forcing users with allowed IP addresses to enter the password to access the page via the auth_basic directive. In the code snippet below, I added my public IP address under the allowed IP address list and used the auth_basic directive to request users to authenticate.
# [YOUR_CUSTOM_SITE].conf
	server {
		...
			location /restricted {
	+			auth_basic "Please enter password to authenticate...";
	+			auth_basic_user_file /etc/nginx/passwords;      # a file where the password is located
				allow 127.0.0.1;
	+			allow [your ip address];
				deny all;
		}
	}
In auth_basic_user_file directive, a password file is needed for matching the user input.
The recommended password management application is htpasswd, which can be installed via apt install -y apache2-utils.
Use the command below to create a new password file. Replace {username} with the real user name (e.g., admin) and follow the prompts.
htpasswd -c /etc/nginx/passwords {username}
We should be able to see the password file under /etc/nginx/ folder. It should contain the username you entered and the hash of the password for that user.
After reloading the nginx configuration, we are able to see the result.
4.Nginx as a reverse proxy
The proxy_pass directive is used when you want to forward a request to a backend server. It must be placed within a location block to specify under which URL path or location the proxying should occur.
# [YOUR_CUSTOM_SITE].conf
	http {
		upstream example {
			server 127.0.0.1:7000;  # The Ip address of the server
		}
		server {
			location /no_trailing_slash {
				proxy_pass http://example;
			}

			location /trailing_slash {
				proxy_pass http://example/;
			}
		}
	}
Within the proxy_pass directive, we define the backend IP addresses or URLs that we want to foward the requests to. Then, in http block we define the upstream directive for the server group named example which is later used in proxy_pass, in the above example, we specify that the backend server can be found at 127.0.0.1:7000.
You might already noticed a small difference between two location directives. The following table shows the differences in how nginx handles the trailing slash in the proxy_pass directive:
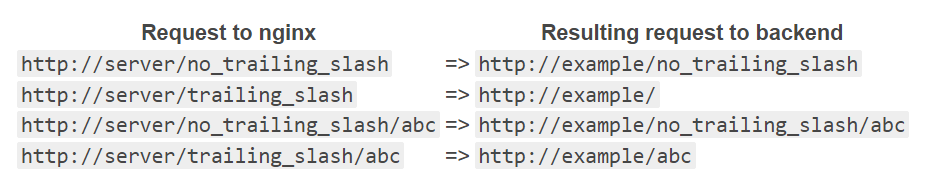
Specifying the trailing slash in the proxy_pass will tell nginx to send everything after the location path to the root of the upstream server. Without the trailing slash in the proxy_pass, nginx will include location path in its request forwarded to the backend server.
To demostrate it, I have created a simple backend server that responds with the requested URL. You can find the script here.
5.Nginx as a load balancer
Nginx load balancer is an ideal choice for scaling applications under heavy load. By configuring multiple IP addresses in the upstream directive, nginx employs rules like Round-robin, Least connections, IP hashing, and weight to efficiently direct requests to the resource group.
The default nginx load-balancing routing algorithm is Round-robin. Each new request is directed to the next server in the server pool in a cyclical manner.
Using the setting below, nginx will forward the first request to /roundrobin to the first server defined in upstream directive (port 7001). The second request will hit the port 7002, and the third request will be served by the port 7003. The fourth request will go to the port 7001 again, and so on. This is because the load balancer keeps track of the order of the servers and forwards each request to the next server in the sequence. When the end of the sequence is reached, the load balancer starts from the beginning again, ensuring that all servers receive an equal share of the incoming requests.
# [YOUR_CUSTOM_SITE].conf
	upstream roundrobin { # roundrobin is the default load-balancing routing algorithm
		server 127.0.0.1:7001;
		server 127.0.0.1:7002;
		server 127.0.0.1:7003;
	}
	server {
		listen 80;
		root /var/www/exmple;
		location /roundrobin {
			proxy_pass http://roundrobin;
		}
	}
To experiment with this and other nginx configurations below, run this backend script in your virtual machine, and you should be able to observe the behaviour shown in the to the video below. Remeber to reload the nginx config using the command mentioned in previous section for this experiment! ʕᴥ• ʔ☝
IP hashing algorithm needs to be explicitly specified in the upstream directive. It uses the client’s IP address as the input to a hash function, which then maps the IP address to a specific backend server from the pool of available servers. This ensures that requests from the same client IP address are consistently routed to the same backend server. Such an approach helps stateful applications to maintain session data or user-specific information on the backend servers, so, there is no need to synchronize the data across multiple servers.
# [YOUR_CUSTOM_SITE].conf
	upstream iphash {
		ip_hash; # need to specify ip_hash directive to use it.
		server 127.0.0.1:7003;
		server 127.0.0.1:7001;
		server 127.0.0.1:7002;
	}
	server {
		listen 80;
		root /var/www/exmple;
		location /iphash {
			proxy_pass http://iphash;
		}
	}
With this configuration, you should be able to observe that requests to /iphash will be forwarded to the same the port number, no matter whether you refresh the page (if you are not changing your IP address).
If you want to have controlled uneven distribution of requests among your servers, use the weight parameter to influence the distribution of incoming requests based on your preference (e.g., the capacity or performance of each server) . As shown in the example below, by assigning the weight of 2 to127.0.0.1:7003 server, 127.0.0.1:7003 will receive approximately 2 times the requests compared to servers 127.0.0.1:7001 and 127.0.0.1:7002 each.
# [YOUR_CUSTOM_SITE].conf
	upstream weighted {
		server 127.0.0.1:7003 weight=2;
		server 127.0.0.1:7001;
		server 127.0.0.1:7002;
	}
	server {
		listen 80;
		root /var/www/exmple;
		location /weighted {
			proxy_pass http://weighted;
		}
	}
With this configuration, you should be observing that port 7003 shows up in the browser twice as often than ports 7001 and 7002, which indicates that the server 127.0.0.1:7003 receives two times the traffic compared to servers 127.0.0.1:7001 and 127.0.0.1:7002.
When the backend servers have varying capacities or performance capabilities, least connections is particularly useful. It distributes requests to servers with fewer active connections, and, therefore, effectively shares the workload between the servers and prevents any single server from getting overloaded while others remain underutilized. Similar to ip_hash, you need to explicitly specify least_conn under upstream block when using it.
# [YOUR_CUSTOM_SITE].conf
	upstream leastconn {
		least_conn; # need to specify least_conn directive to use it.
		server 127.0.0.1:7003;
		server 127.0.0.1:7001;
		server 127.0.0.1:7002;
	}
	server {
		listen 80;
		root /var/www/exmple;
		location /leastconn {
			proxy_pass http://leastconn;
		}
	}
least connections load balancing algorithm can be tricky to capture on video, so no video, folks.
Would you be able to identify how nginx has been used in your organization? Leave a comment and let’s share the knowledge!
Thank you for investing your time in reading this blog post. I hope you find this blog helpful with learning nginx ~ ʕ •ᴥ•ʔ